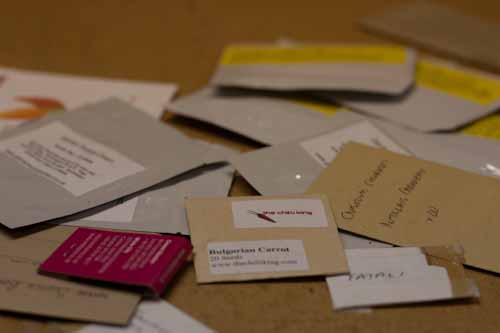
It’s that time of year when I start to think about germinating chilli seeds and planting up ready for the season ahead. I’ve had a few requests from readers to describe the best way to germinate chilli seeds so I thought i’d share the guide below.
The Wet Tissue Method
I have found this to be the quickest method of germinating chilli seeds though it does involve an extra step in the process when compared to planting seeds straight into compost.
First of all here is what you’ll need:
- a large sandwich/freezer bag
- some kitchen tissue paper
- a shallow tray/lid
- a water mister
All you need to do it double up a piece of kitchen roll and mist with water until well moistened, then lay it flat on the lid/tray. Next carefully place your seeds on the wet paper spacing them about 2cm apart before placing another wet layer of tissue on the top. Gently firm down and place the whole lot inside the sandwich bag and seal tightly to keep the moisture in.
Next you need to place the bag somewhere warm to aid the germination. Ideally an airing cupboard would do or somewhere with a constant trickle of heat 24/7 such as on a computer tower or the top of a fridge freezer (the elements at the back give off heat).
Open up the bag every day and check the seeds for signs of growth. Initially you should notice the seeds bulge slightly (as a result of absorbing moisture). Next the seeds should start to sprout from the pointed end of the seed. Once most of the seeds have begun to sprout you should move them into a fine potting compost (see below).
Be careful when handling the seeds at this stage as they are incredibly delicate. I use an old fine paint brush to move the seeds around as opposed to pinching them between my fingers and causing damage.
The Regular Compost Method
Choose a fine potting compost and sieve it into either seed cells or a regular seed tray. Level off and spray with water to moisten the soil and leave for 5 minutes for the moisture to soak in. The compost should be moist nnot wet.
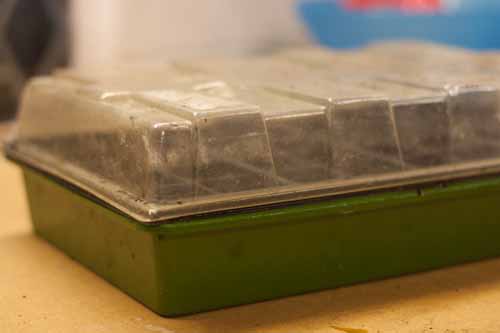
Next add the seeds to the tray (if you want to be precise add them with the pointed end down) in small lines leaving at least 5cm between seeds. In the shot below i’ve used a modular seed tray planting one seed in each cell.
Next sieve another 1cm of compost over the top and spray again with the mister to moisten the compost. Avoid adding too much moisture as this can pull the seeds down too deep in the compost, impeding germination.
Next you need to cover the seed tray to help keep the moisture in. Some seed trays come with a plastic lid or if you have a propagator place the seed tray in there, if not a large plastic bag will do the job fine. Just remember to remove the bag as soon at the seeds sprout so the light can get to them. All you need to do now is place the seed tray somewhere warm and check daily for moisture levels and germinating seeds.
The Heated Compost Method
I have found this to be the best way to germinate chilli seeds. This method combines the best of the above two methods. First you follow the regular compost method then you either place the seed tray in a heated propagator or as I do use my little cheat to speed up germination.
The main benefit here it that by using a heat mat or a heated propagator you are delivering a constant supply of heat to the seeds at exactly the right temperature required for germination to occur. Heated propagators have been coming down in price in recent years and can now be picked up cheaply.
Chilli Seed Germination Tips
Constant Temperature
The seeds will germinate much quicker if they are kept in an environment with a constant temperature. Whether this is in an airing cupboard, on top of a freezer or in a heated propagator it really doesn’t matter as long the the temperature is constant 24 hours a day.
Windowsills are often poor places to germinate seeds as while the daytime temperatures are often warm, night time temperatures can plummet thanks to poor insulation and cold drafts.
Aim for a constant temperature of between 26-32 degrees Celsius (80-90 Fahrenheit) for the best seed germination success.
Label Your Seedlings
If you’re anything like me you always end up planting way too many chilli seeds each year and lose track of which plants are which come the spring when the seedlings transform into young plants and get potted on. As boring as it is take the time to label your freshly planted seeds as you plant them to ensure you always know what variety your plants are. Also it can be useful to compare germination rates of different varieties once the seedling sprout.
Get Moisture Levels Correct
Without moisture our seeds will not germinate. No matter where your seeds are you’ll need to check them at least daily to ensure moisture levels are correct.
Avoid water logging the seeds by using a fine mister to moisten as opposed to pouring water onto the seeds. If they look too wet remove the cover over the seed try to increase air flow and evaporation.
While it is crucial to keep the seeds moist while waiting for them to germinate it is possible to keep them too wet and have fungus or disease set in. To avoid this i often mix in a little vermiculite with my compost to help aid drainage and keep the soil loose for easy root growth.
An ideal pottng mix should feel moist to touch but when squeezed in your fist no drops of water should come out.
Use Good Quality Chilli Seeds
Always buy your seeds from a reputable dealer. I now find Amazon to be the best place to buy chilli seeds with many varieties available. When storing seeds store them in a air tight container in a cool dark place.
Don’t Plant Seeds Too Close
If using a standard seed tray, aim to leave at least 5cm between seeds when planting, ideally about 10cm if possible. The more space you leave the less chance the roots will become intertwined and damaged when you pot the seedlings on in a few weeks time. A great way to avoid this (and my prefered approach) is to use modular seed trays with individual cell units in which you plant 1 seed per unit (see the picture above).
Track Seed Germination Rates
I have found over the years that my seed box is always over flowing with half used seed packets bought in previous years. As seeds age their germination rates decline. To avoid poor success rates I try and check the germination rate on each batch of seeds and discard any packets of seed with low rates. To do this when labeling the planted seeds I try to add the sowing date, variety and seed source. By doing this I can easily identify which batches of seeds are sub par and can be thrown away.
To keep your seeds in the best possible condition try and keep your seeds in cool dark place. My seed box lives in the garage throughout th year, away from heat and light.
Pre Soaking Chilli Seeds
If you’re wondering how to germinate your seeds faster this trick might help. Some people claim that presoaking seeds in either water or chamomile tea for 24-48 hours improved germnation rates.
While presoaking can speed up germination slightly (by softening the seed shell) I have not seen any improvement in overall germination rates. However if you are impatient to grow chillies or late planting your seeds, pre-soaking the seed can help speed things up.


Hi,
I’m doing the wet tissue method this year as last year i had poor germination in my “heated propigator” (just noticed this year, it only heats about the middle third of the thing!).
But a question – how do i know when they’re germinated and ready to plant out? Do you have any photo’s of a germinated seed by any chance?
thanks.
Ian – Your best bet is to check the seed twice a day. After a while (so long as you keep them moist) you should notice the seeds start to swell. Eventually if you look carefully you’ll notice one or two start to sprout out of the seed casing. Unfortunately I don’t have any pics but you’ll know when it happens. At this point plant up all of the seeds very carefully to avoid damaging them. Good luck!